
The blocks for this week, from pages 13, 14, and 62, are being presented this week by Marion! Just as a background, I met Marion about two years ago -- and I've loved her ever since! We both went to the Cabin Fever quilt retreat that Emily Herrick put on, and I sat at her table. I was a little nervous at first -- I didn't have any idea what to expect -- but it was so much fun! And a big part of that was how welcoming Marion was. The link to Marion's blocks is {here}.
When I planned out all my blocks, I decided which ones I liked best straight on and which I liked best on point, and then I put them all in the order we were doing them. The only one I'm doing this week is from page 14 - Duck and Ducklings. I have to admit, I completely ignored Marie Henry's instructions -- I knew I wanted to make these blocks a little differently so I didn't have to work with 11/16th measurements!
Ducks and Ducklings block, page 14

I had two options -- to make the measurements nice and easy, I could make the center strips 1" finished, or I could make them 1 1/2" finished. I decided to make them 1" finished, which makes each of the corners 2 1/2" finished.
First, I cut a background strip and a print strip (pink), each at 1 1/2" x 7". I also cut a 1 1/2" pink square. I sewed the strips together along the long edge, ironed, and cut them apart so they made four 1 1/2" x 2 1/2" two-patches. I sewed two of the two-patches together, then added the square, to make one long strip; the other two-patches I just set aside to use later.

Then, I made my own little paper piecing patterns. First, I tore out a piece of notebook paper (just ignore the red and blue lines!). I marked four 2 1/2" squares (leave about 1" in between all the squares if you can -- it will really help you to have plenty of overlap for the 1/4" seam allowance)...

then divided them in half (at 1 1/4") both vertically and horizontally.

Next, I marked the diagonal lines,

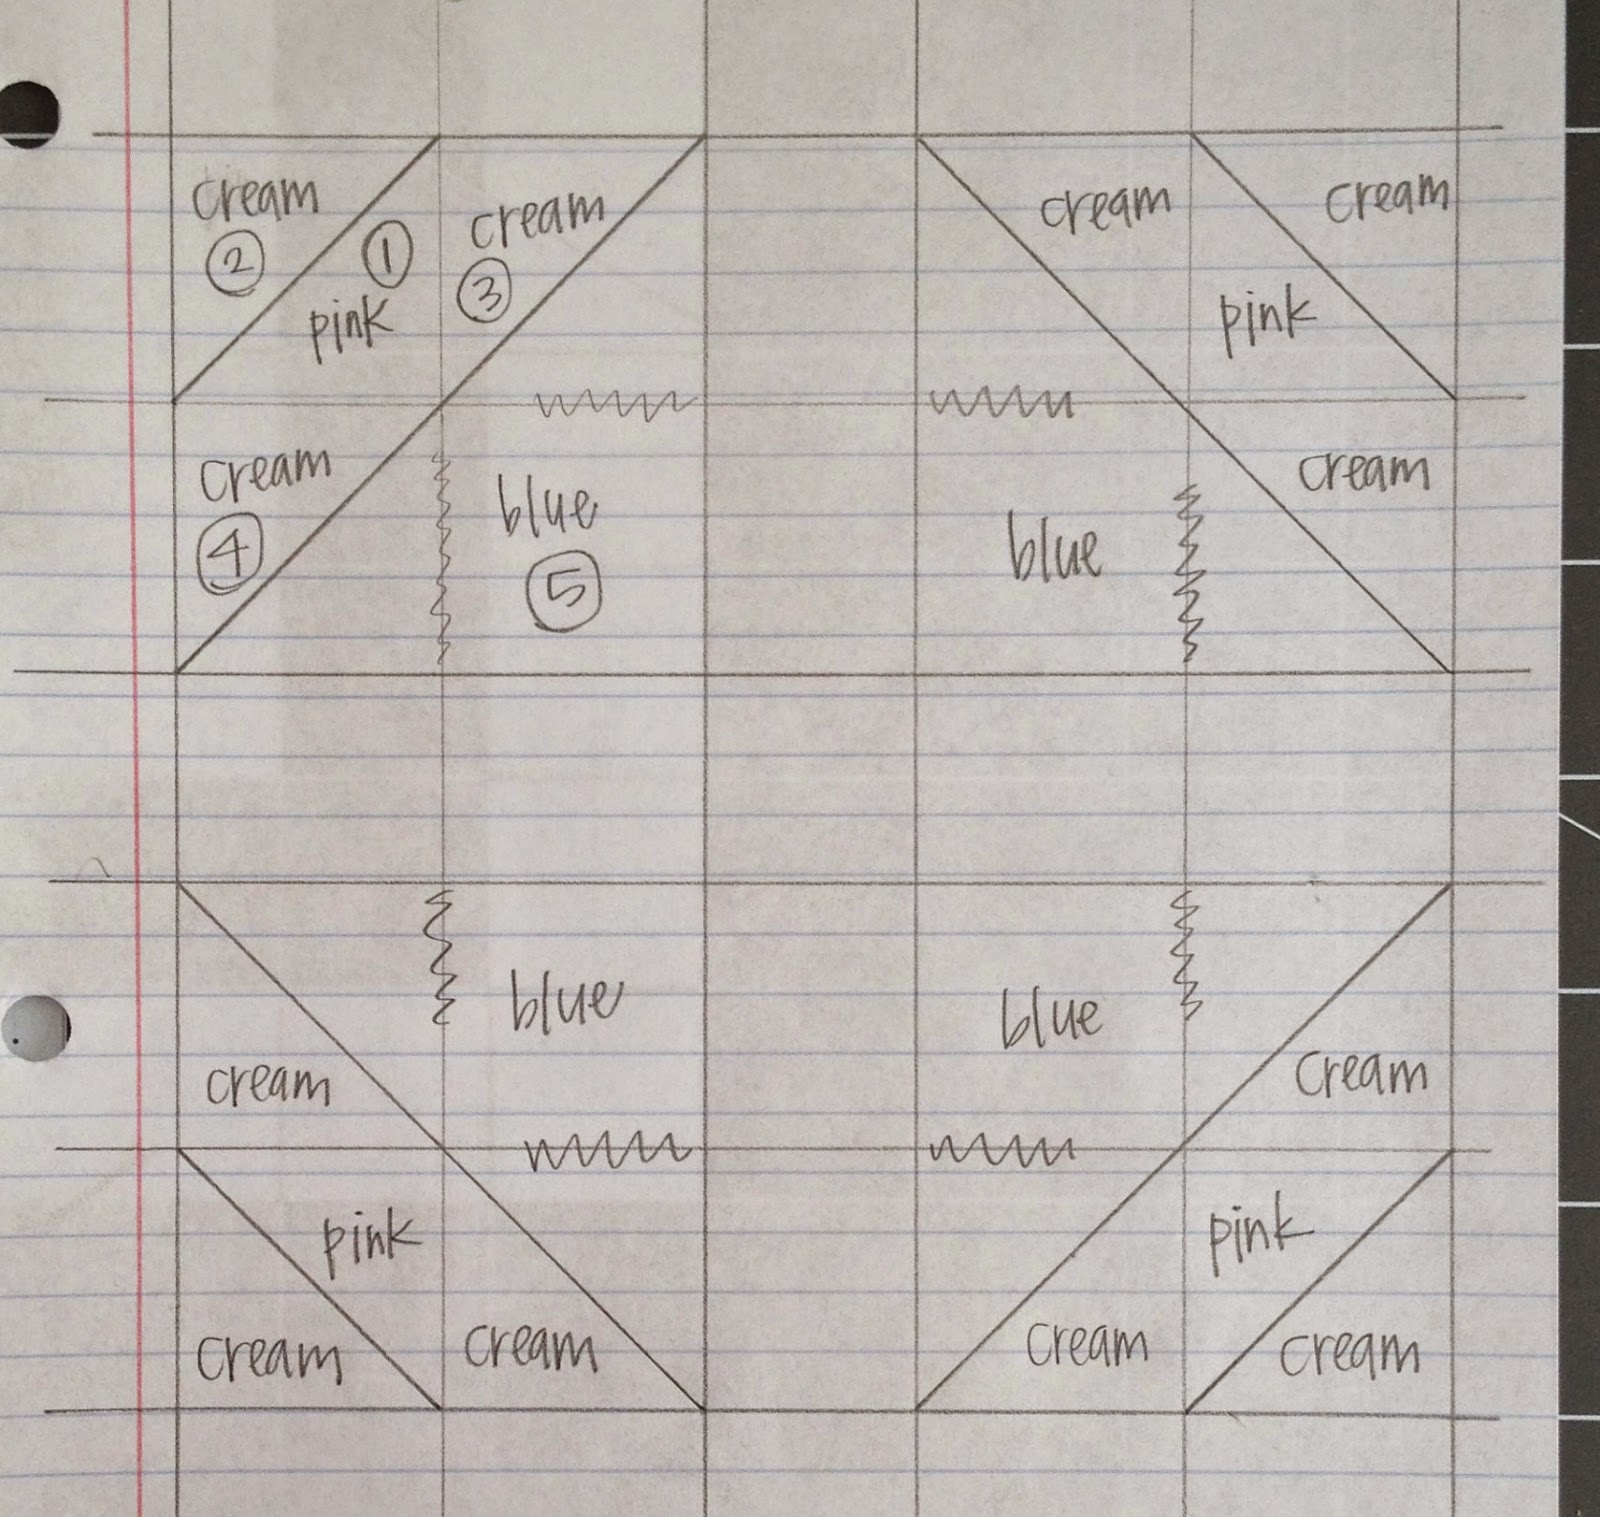
Do you see the "blue" squares? I squiggled out the lines I don't want to sew on -- but I was careful not to squiggle them all the way out, because I need to overshoot that line by about 1/4" with the seams when I sew on the middle creams.
See how easy it is to make your own paper piecing templates? I use them every time I have TINY piecing to do -- especially if the piecing needs to line up precisely. And then I just cut apart the squares and paper pieced -- the pink and outside cream triangle were first, then the middle triangles, then the blue flowers (see above picture for numbers if that explanation doesn't make sense!).
Last, I just put the blocks together like a nine-patch; first I made rows, then sewed them together. I think it turned out really nice! And thank goodness -- it turned out EXACTLY 6" square!
No comments:
Post a Comment
I love comments and try to respond to every one. Please let me know if you need clarification on something, want to know something, or especially if you LOVE something!